The fabric and pattern pieces for this nightshirt have unfortunately spent many months living in a cupboard. I got as far as working out a cutting layout and preparing the fabric. Then a friend came to stay and I needed to clear things away. Funny how things drift out of your mind once they’re out of sight… anyway, I found the poor old nightshirt the other day and thought I’d better get on with finishing it.
Fabric and layout
I had 2.5m of 113cm-wide medium-weight cotton chambray fabric. I could just about fit my nightshirt pattern pieces to this amount of fabric with this layout:

The main piece of fabric is folded in half. The piece cut off for the sleeves is folded again so that there are four layers of fabric to make two sleeves. Just the back, back facing and sleeves are cut on the fold.
Sewing the nightshirt – order of work
After cutting out the pieces and transferring the pattern markings, I sewed the nightshirt together in the following order. The figure numbers in brackets refer to the Jalie pyjama jacket pattern that the nightshirt is based on.
Collar
- Pin collar pieces right sides together and stitch seam round edge (fig.10). Notch curves (fig.11), turn right side out and top stitch (fig.12).
- Pin fronts to back at shoulder seams right sides together (fig.13) and stitch seams. Finish seam edges with zigzag stitch.
- Pin collar to neckline (on right side) at mark (fig.14) and stitch (fig.15). Zigzag stitch along seam.
Neckline and front facings
- Pin front facings to back facing, right sides together at shoulder seams (fig.16) and stitch seams. Finish seams using zigzag stitch.
- Pin facing to garment right sides together (fig.17) and stitch centre fronts and neckline (fig.18).
- Notch neckline and curves (fig.19). Finish raw edge of facing using zigzag stitch then turn under and top stitch.
- Turn right side out and top stitch centre fronts and neckline (fig.21).
Sleeves
- Pin right side of sleeve facing to wrong side of sleeve (fig.22) and stitch edge seam.
- Bring facing to right side of sleeve, fold under 1cm (fig.23) and top stitch 3mm from edge.
- Pin sleeve to armhole right sides together, matching single notch with shoulder seam (fig.24). Stitch seam then finish using zigzag stitch.
Body
- Tack facing to garment at shoulder seam (fig.25).
- Pin at side seams and sleeve right sides together and stitch from hem to cuff (fig.26). Finish seams with zigzag stitch.
- At cuff, press the seam allowance towards the back (fig.27) and top stitch on right side to keep it in place (fig.28).
- Fold hem up by 1cm then by 1-1.5cm, pin in place then stitch.
- Mark positions of buttons (fig.30) using buttonhole markings from pattern. Sew buttons and buttonholes to centre front (fig.31).
I found that assembling the nightshirt was quite a challenge – I’ve not tackled facings, sleeves or collars before so it was an interesting experience. My stitching is a bit wobbly in places but it will do!
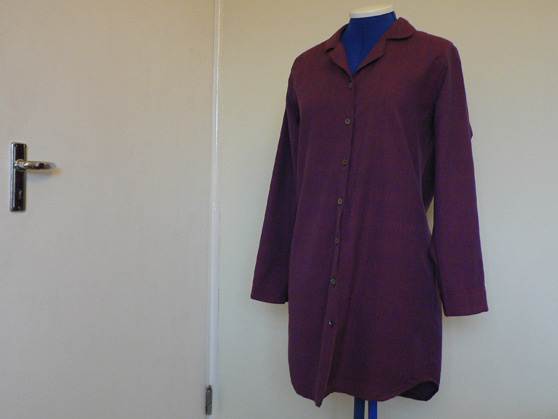
The finished nightshirt
I’m pleased with it overall as it fits well and does actually look like my original design.

And the others?
In my plan to sort out my nightwear, I decided that I needed three nightshirts. Obviously, while making this nightshirt was a deeply rewarding experience, it did take me ages to finish it so I’ve cheated and bought the other two nightshirts.


{ 2 comments… read them below or add one }
Hi Steph,
Hope this isn’t too personal a question: what is it like to wear? Tempted to make my husband PJs as they are so hard to find in the shops.
Sue
x
Hi Sue,
The nightshirt’s pretty comfortable to wear though I’m glad I didn’t make it any smaller than it is. It is perhaps a bit on the heavy side as the cotton fabric is fairly thick. To be honest, I think I prefer the nightshirts I bought from Marks and Spencers – sad but true! It was very good practise though as I’ve never tried making a shirt-type garment before.
If you’re looking for pyjamas, you could always try websites like Bonsoir or Idlewild if you can’t see anything you like in the shops.
All the best,
Steph