This is a casual skirt that I made from olive-green chino fabric as an alternative to wearing shorts in the summer. The measurements for the skirt are based on some drawstring trousers from SEW Everything Workshop and a concealed zip A-line skirt that I made. I wanted to make the skirt quickly so just used a simple drawstring for the waist. It’s a pretty simple design – basically a slightly-shaped tube with a casing at the top for the drawstring. I used a flat fell finish for the side seams so the skirt feels quite solidly constructed and there are no raw edges anywhere.
Pattern
I drafted the skirt pattern to fit my measurements. Here’s the basic method:
- Decide length – 55cm in this case so that the skirt sits just above the knee
- Meaure hips. Add 5cm for ease – this gives the circumference of the skirt at hip level
- Make the circumference round the waist roughly equal to your hip measurement so that you can get the skirt on
- Add a small amount of flare between the hip and hem to get an A-line shape – I added about 6cm in total
Rather than making the front and back pattern pieces identical by dividing the circumference measurements by 4, I made the back waist slightly narrower than the front, and the back hip slightly wider. I’m not sure that this made a whole lot of difference though so would be inclined not to bother if I did this again.
Seam allowances: I added 4cm for the waistband casing, 1.5cm for the side seams and 4cm for the hem. I copied the position of the buttonholes in the waistband from the drawstring trousers in SEW Everything Workshop.
I made the tie from the same fabric as the skirt but didn’t make a pattern piece. Instead I drew a 3cm-wide strip straight onto the fabric.
Fabric
150cm-wide olive-green chino fabric – I used a length of about 70cm to make the skirt.
Cutting layout
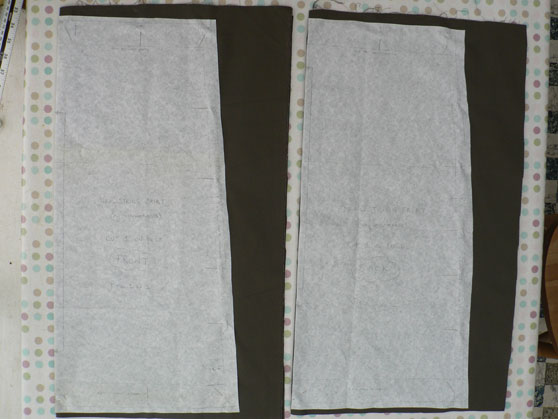
I had to fiddle about in cutting the pieces out because of the way I drafted the pattern (I forgot make the front and back mirror images). I pinned the front skirt piece on, then marked the tie on and cut it out. I then cut down the middle of the fabric and pinned the back skirt piece on the underside. Finally I cut out both the front and back pieces. I transferred the pattern markings and marked the wrong side of the fabric on all pieces.
Sewing
- Pin front and back pieces wrong side together and sew side seams – 1.5cm seam allowance.
- Check that skirt roughly fits before going any further!
- Press seams then finish using flat fell method – trim one of allowances and fold in other over then sew on outside of skirt.
- Make two buttonholes where marked using a 1/2″ button.
- Turn skirt inside out and sew waist casing: fold raw edge in 0.6cm and press. Fold in again 3cm, press and pin in place. Stitch along folded edge of waistband and press. Add a second line of stitching 0.5cm in from the first line of stitching (see page 123 of SEW Everything Workshop diagrams and more detail).
- Make tie by folding fabric strip in half (wrong sides together) then folding edges into centre. Stitch on right side.
- Insert tie into waist casing through buttonhole and pull through to other buttonhole.
- Try on skirt and decide final length, shorten if necessary.
- Hem skirt – turn up 1.5cm and press, then turn up 2.5cm. Pin, press and machine stitch.
The finished skirt
It just about works OK and is wearable – it looks best with most of the gathered fabric moved round to the back of the skirt. The fabric is a bit too stiff to do well with the drawstring and the skirt does look a bit bunchy round the waist. If I made this again, I would either use a softer fabric or cut the pieces on the bias. I think I could also shave a few centimetres off the waist and tug the skirt on. I’m pleased with the construction – it’s the first time I’ve tried the flat fell seam finish and I like the neat effect and the fact the skirt feels very sturdy.


{ 1 comment… read it below or add one }
Hi Steph! Thanks for giving me the idea, for beginners like me, I’ll also try to make skirts! Ill subscribe in your blog and hope you can check my blog too and ill try to post there my finish product. I really love your blog! Here’s mine: taymecanencia.wordpress.com