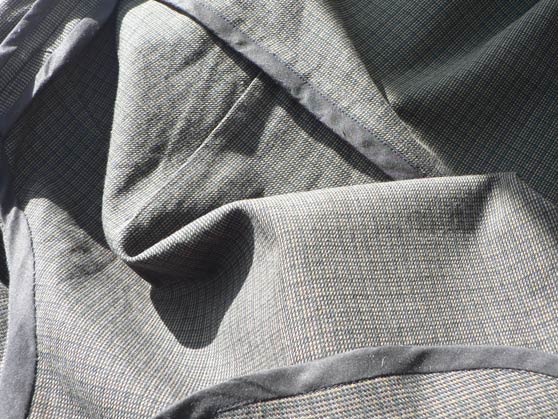
I’ve finally finished the wintry dress of doom and, surprisingly, am quite pleased with it. I even wore it to work last week.
Here’s the method I used to sew it. The stitch length was 2.5mm except for the darts which I sewed with a 1.8mm stitch (this was overkill really as 2.5mm would have been fine).
Preparation and cutting out
- Check pattern and add any extra markings
- Iron fabric again, pin and cut out pattern pieces
- Transfer pattern markings
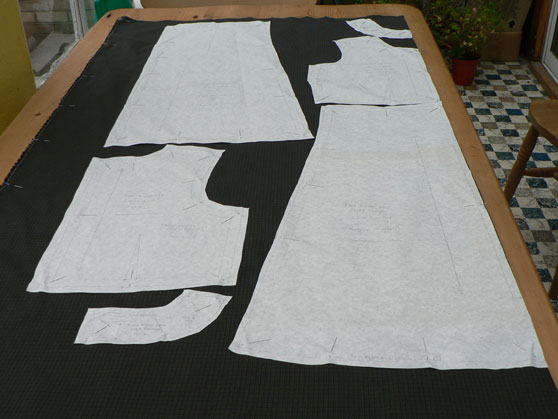
I bunched up the layout from my original plan as I wanted to get the pieces as close together as possible on the fabric. I used bias strips cut from a metre of black lawn to bind the armholes so didn’t need to cut bias strips from the dress fabric. Pattern pieces are pinned to the wrong side of the fabric: the right side is folded to the inside. I mark the wrong side of the fabric with a chalk cross when I take each paper pattern piece off.
Make bias strips for seam finishes and armhole facings
- Cut a practise bias strip and try out Hong Kong seam finish
- Experiment with bound seam (for bodice-skirt join)
- Decide on width of bias strip for seams and armhole facing
- Cut bias strips
I cut all the bias strips from a metre of black cotton lawn:
- 2.5cm wide for Hong Kong finish
- 3.5cm wide for binding edges
- 6cm wide (and 45cm long) for armhole facings
Sew bodice and skirt
- Sew all 8 darts, finish and press to centre
- Sew bodice to skirt (1.5cm seam) and finish seam (one front and two back pieces) by binding edges together and pressing upwards
- Sew bottom part of centre back seam (1.5cm allowance)
- Tack zip in place then sew
- Finish seam edges on centre back with Hong Kong finish
- Sew shoulder seams (1.5cm allowance), press open and finish
Make neck facing
- Cut out 3 pieces of interfacing and remove all seam allowances
- Fuse interfacing to neck facing
- Tack then stitch the shoulder seams and press open
- Stay-stitch around edge of inner curve 1.5cm in from edge
- Trim outer corners of shoulder seams
- Finish edge neck binding with bias strip
Attach neck facing
See page 210 of Reader’s Digest Complete Guide to Sewing
- Lay neck area flat and place facing on top, right side to right side. Open zip and wrap ends of facing around each zip half.
- Match shoulder seams and neck edge and pin in place
- Sew facing to neckline (1.5cm seam allowance)
- Trim facing side of seam down to half its width, then clip V-shapes around the neck edge
- Press seam allowance towards the facing
- Under-stitch (on the facing side) by stitching the seam allowance to the facing about 5mm from the stitching line
- Turn facing to wrong side letting seam line roll to inside slightly and press finished neck edge
- Whip-stitch facing in place by stitching to seam allowances at shoulders
- Fold the ends of the facing under and pin to zip tape. Make sure facing will not be caught in zip. Open zip and slip stitch facing to zip tape.
- Close zip and attach hook and eye at top of placket
Sew side seams
- Sew front and back of dress together along side seams (1.5cm allowance). Press open and finish edges using Hong Kong finish.
Bias facing of armholes
See page 215 of Reader’s Digest Complete Guide to Sewing
- Fold bias strip in half lengthwise and to curve of armhole using steam iron
- Pin and tack facing to right side of garment, keeping all edges even
- Stitch along seam line then remove tacks and press
- Trim and layer seam allowances (garment seam allowance is widest). Cut notches.
- Extend facing up and away from garment and press along seam line
- Turn facing to inside of garment letting seam line roll slightly beyond the edge. Turn under and lap edges of facing near the bottom of the armhole.
- Pin in place, tack then slip-stitch by hand
Hem dress
See page 307 of Reader’s Digest Complete Guide to Sewing
- Try on dress and decide on finished length, turn up and pin in place
- Tack close to edge of fold
- Trim excess and machine tack 6mm from edge of hem allowance
- Gather fabric a little and fold hem allowance under along machine tacking line
- Slip-stitch by hand
So that’s the method – more pictures and some philosophical musings to follow.


