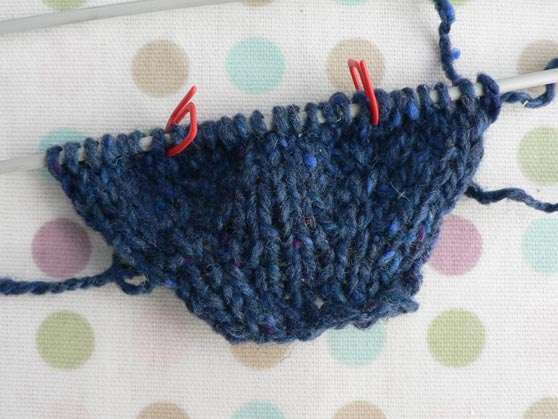
Oh dear, oh dear, oh dear… and other rather stronger phrases. This Leaf T-shirt (Ravelry link) has gone really, really wrong. Not a good moment when I realised that the arms are not where they’re supposed to be. What I find hardest to believe is that I managed to knit two whole balls of wool before I noticed this…
I’ve so far resisted the temptation to rip the knitting off the needles and stamp on it as I want to work out what’s gone wrong. The problem looks to be with the raglan increases.
The pattern instructions for the increase row say: Knit 22, yo, slip marker, k1, yo, knit to next marker, yo, slip marker, k1, yo, knit next 43 stitches (slipping the lace panel markers as you go), yo, slip marker, k1, yo, knit to next marker, yo, slip marker, k1, yo, k22.
Now, several hundred people have made this top and don’t seem to have had a problem with it so I guess I’ve somehow misinterpreted the instructions.
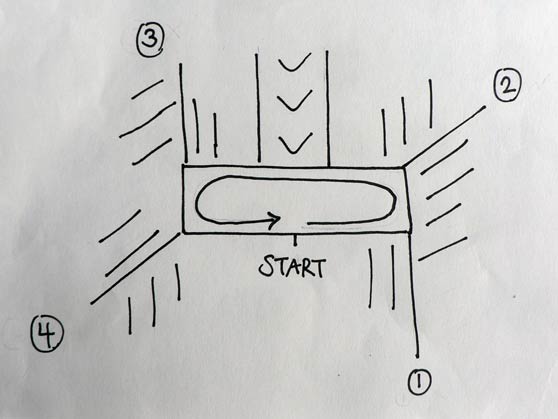
Raglan increases are supposed to look like this:

Looking at other top-down raglan jumper patterns (like this Beginner’s Top-Down Raglan on Craftster) the important thing seems to be to increase one stitch on either side of the marker. The different ways of increasing produce different looks – the yarn over method creates a sort of ladder effect.
To make sure that I understand raglan increases I made a couple of samples. Here’s some raglan increases using yarn over:

And here are some raglan increases, knitting into front and back of stitch before and after marker:

Looking at it again, I guess there’s a typo in the pattern* – it should read ‘yo, K1, slip marker, yo, K’. Trying to look on the positive side, some good things about this total disaster situation are:
- I now understand a lot more about making top-down raglan sweaters.
- I can try on the top when I take if off the needles and see if I like the neckline and change it if it doesn’t fit.
- I quite enjoyed the knitting and now have the chance to knit it all again (hmmm, perhaps scraping the bottom of the barrel with this).
Oh well, time to take the top off the needles and rip it back – hopefully just to the rib as casting on was a total pain. And perhaps I will stamp on it just a couple of times first.
*Following the helpful comments below from people who are much better at knitting than me, I don’t think that there was a typo in the pattern – I guess I just screwed up following the instructions! It all worked out in the end though and I managed to finish the top using my fudged method.


{ 10 comments… read them below or add one }
thank you for writing this. I have discovered that I just did the same thing and it is a solace to find your humble and informative write up.
Hi Nita,
Thanks for your comment and glad that the post offered some comfort. I still can’t believe how long it took me to realise that things had gone very wrong…
Steph
Actually, I thought that was the soltuion for many years, until attending some classes with an expert who reminded me that using a size larger needle increases the HEIGHT of the stitch, but not the DISTANCE BETWEEN STITCHES (this is what produces the too tight cast on) .so simply being careful to keep enough space between the cast on stitches really does the trick. Need a video, try Cat Bordhi. Also, I use the old Norwegian cast on for items where more stretch is required (hats, socks, etc). Really works. (She also has a really stretchy cast off tutorial, quite good)
it took me 18 rows to realize my raglan was drastically wrong, but your post was the easiest to understand why it was wrong, you saved me much frustration and hair pulling.
Glad that the post saved you some hassle! I did rip back the top and start again, this time with raglan increases that look like they should. One day I may even finish it….
Is it really a typo? I am trying to make this Shroodie
http://www.ravelry.com/patterns/library/shrug–hoodie–shroodie
and it has the same type of increase (knit to marker, yo, slip marker, K1, yo). The same thing was happening to me, with all of the increases slanting the same direction and my markers moving by 1 to the right. After knitting several rows, one front flap had fewer stitches and the other had way more stitches.
I just ripped it all the way back to the hood and was trying to find a better increase that doesnt involve the yarn over to be over the stitch marker.
I think Im going to try the KFB before and after the marker. Hopefully that will be ok with garter stitch. Thanks for this post….I was thinking I must be really stupid! It makes me think that maybe I should only knit patterns that are well tested.
It’s not a typo. I’m doing http://www.ravelry.com/patterns/library/anthropologie-inspired-capelet and the increases are the same (except on the purl side). : k2, *p to next marker, yo, sl marker, p1, yo* repeat from *. I’ve ripped it out two times because the yo’s keep going under and over the markers. I need to get some markers like the ones pictured.
Thanks Michele!
Steph
To me it seems that the instructions are correct: knit to marker -> YO, slip marker, K1, YO -> knit to next marker. So you slip the marker after the first YO, before the K1. That way your increases flare out evenly.
\-/
/-\
If you do the K1 before slipping the marker, you essentially move the marker one stitch to the right on every row, creating slanted increases.
| —
— |
Hope this makes sense to you (and that the crude picture I tried to make is readable after I press Submit).
Thanks Kim – I’ll have another look at it and see if I can work out where I went wrong.
Steph